Monday, March 16, 2015

{MIY} MAKE-IT-YOURSELF MONDAY! For Adults Only!


This magical concoction is the perfect light, refreshing way to wind down from a hectic Monday, enjoy it as a pre-game drink before a date night, OR it can serve as a great Sunday-Funday beverage to sip on while lounging at home on a rainy day!  My boyfriend and I tested this personally last Sunday on our lounge day and it won an A+  :O)

Here's what you need:

LaCroix Sparkling Water
White wine of your choice
Strawberries
Blueberries


First, pick out some delectable blueberries and strawberries.  


Wash them up and then dice them up really well.  Put them in a bowl and (here's the fun part) mush them up uber mushy.  (confession:  I actually needed my boyfriends aid on this part as I'm apparently not skilled at mushing fruit)


Put a couple spoonfuls of your fruit mix into the glass.


Next pour in equal parts of LaCroix and your white wine, garnish your glass and enjoy!  


I hope you are refreshed with this sparkling glass of joy, CHEERS!!  :O)


Sending you uber loads of Love, Light, and Laughter!

~Cassie


Thursday, March 12, 2015

His Love Makes Me Smile :0)

Love is when you send flowers to surprise her when she's home sick because you know it will brighten her day while she's recouping at home. 

I'm so thankful for him.  :0)

Monday, March 9, 2015

{MIY} MAKE-IT-YOURSELF MONDAY! All Natural Body Scrub

For those of you guys and gals that enjoy finding ways to pamper yourself at home during those rare, quiet moments you get during your busy week, this is a wonderful way to do so that is inexpensive and tantalizing to your senses. This body scrub is a wonderful way to relax yourself before a sweet nights slumber or to awaken your energies in preparation for a productive day. Wild orange, peppermint, lavender, melaleuca; whichever scent pleases your mood can be infused into your all-natural body scrub.

Here's what you need:

Glass Container
Extra Virgin Olive Oil
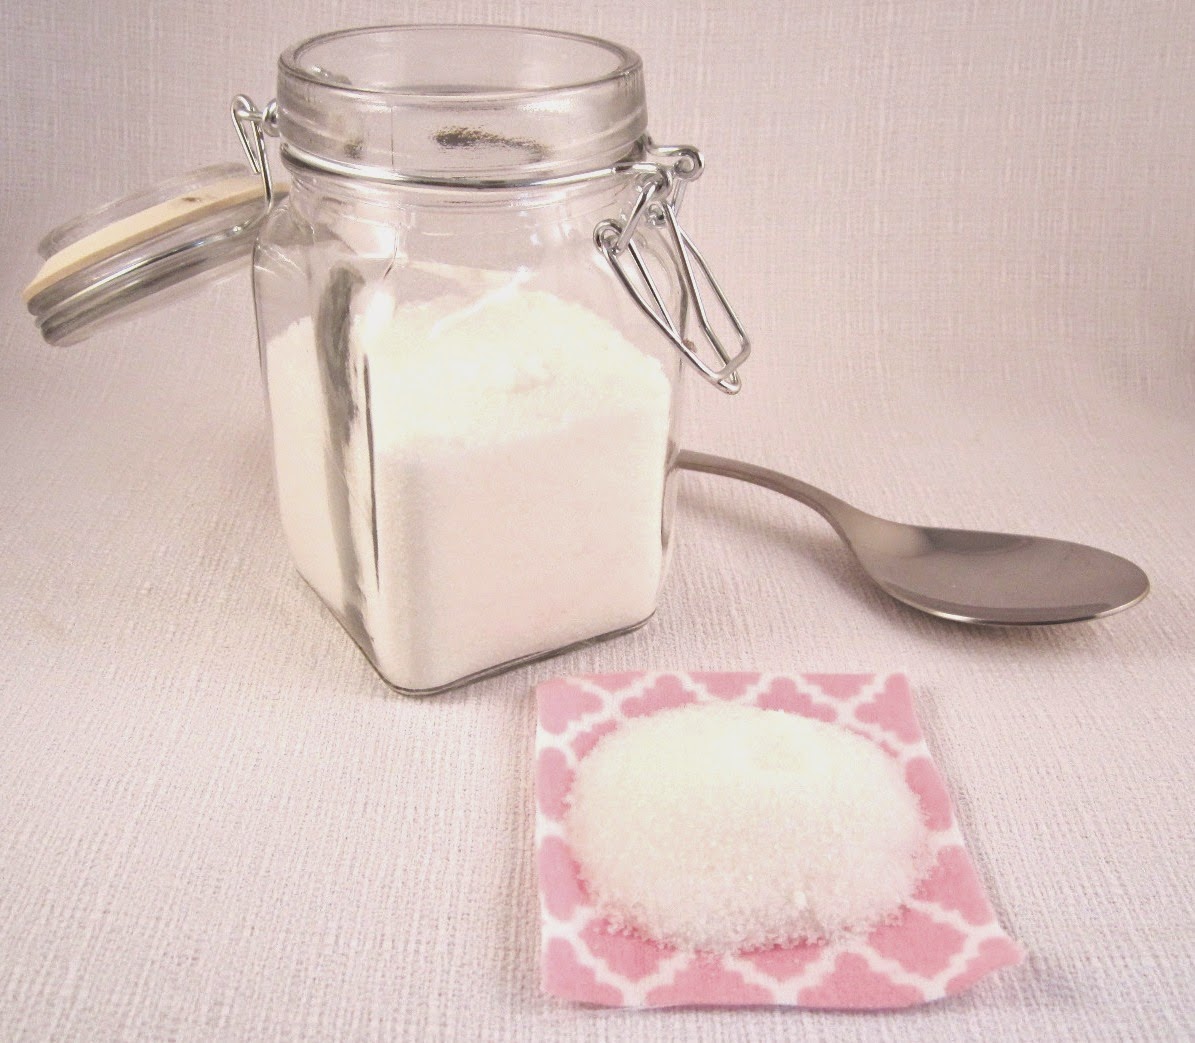
Sugar
Essential Oil(s)


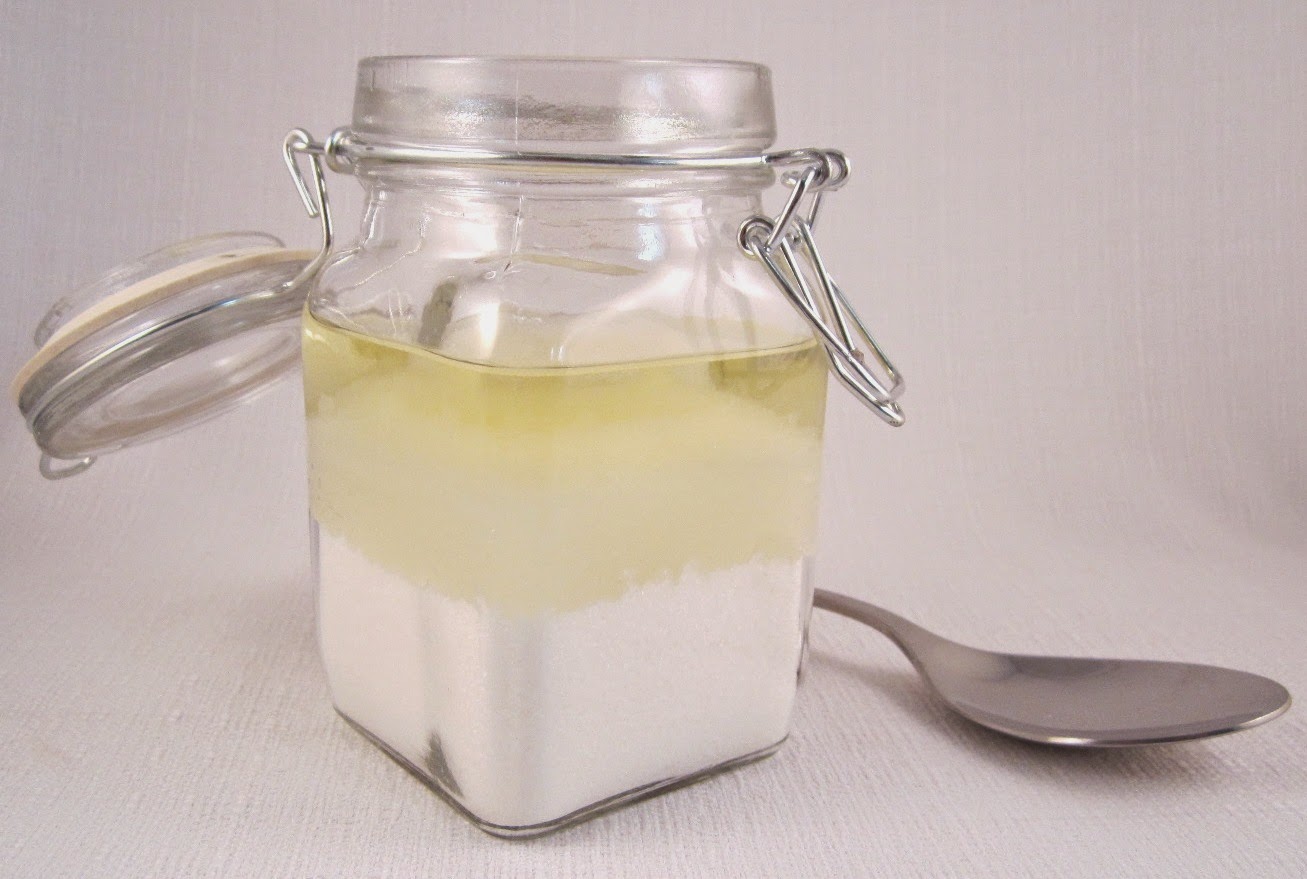
First, fill your container 3/4th's sugar.


Next, fill 1/4 up with your EVOO and mix as good as possible.


Then add the essential oils of your moods choice. (side note: Gauge the consistency as you mix the oils and the sugar. You don't want it to be oily because once the water in your bath or shower mixes with it, the sugar will dissolve and it will thin out too quickly.) An ideal body scrub is thick with enough exfoliation and becomes uber invigorating to your senses. Now you have yourself a beautiful, all-natural body scrub! :O)


If you are making a body scrub as a gift, you can decorate the jar to make it uber spancy! :O)


I hope you enjoyed the project this week to treat yourself during one of your rare "me-time" moments.  :O)


Sending you uber loads of Love, Laughter and Light!

~Cassie


Monday, March 2, 2015

{MIY} MAKE-IT-YOURSELF MONDAY! Money Management Jars

Last week we made chore charts for our little one(s) to help them keep track of the chores they are responsible for each day.  Nickelbug is LOVING hers, she even woke up early a couple times last week excited to do her chores!  She enjoys flipping the cards over to show the smiley face indicating that she's done that chore for the day.  This is such a fun way to get her motivated and also it builds her confidence knowing she's contributing to helping me take care of our home :O)  


Along with her beginning to take on chores, she is now starting to make earnings for the work that she does each week.  The chore chart is a way for her (and I) to track her progress for each day to make sure all her responsibilities are taken care of by the end of the week in order to get paid.  Instead of her putting in hours at the office for her earnings she is putting in time by completing certain chores each day.  Right now she is 6 so the chores are simple, short tasks that she is capable of completing.  As she gets older the chores will change to meet her capabilities as she grows.  If I were to make them harder, more time consuming, or too complicated right now then it would only burn her out and discourage her.  My goal is to encourage her and build her up through this process :O)


Even at such a young age, with her making a small amount of earnings I think it's important to start teaching her how to manage her money.  For a Christmas gift from a family member, my boyfriend received Financial Peace University by Dave Ramsey which is a class I've been wanting to take.  In one of Dave's segments he talks about an envelope system to help manage your money in a simple manner.  


For Nickelbug I decided to create some pretty jars, instead of envelopes, to aid in teaching her how to manage her money as she receives her earnings each week.  The amount of earnings your little one earns is up to you.  Every age is different and every households needs vary so please don't feel the need to repliccate my exact amounts.  I'm sharing what works for us at this point in time.


Nickelbug is now receiving $5 at the end of the week if she completes her chores each day (4-5 simple chores).  I am teaching her to split up her earnings and place them in 3 separate jars: Spend, Save, and Give.  She will be putting $2 into Spend, $2 into Save, and $1 into Give.  Along this journey I will be reinforcing why we should set a limit to how much we spend, the importance of setting aside a certain amount to save for future goals, and how important it is to give and how it pleases God's heart and blesses us when we do so.


In combination with the chore chart, she was SOOOO excited last night to receive the jars and to count out her earnings for the week and to divide it up for each jar.  I briefly explained to her what each jar means and what we will be working on regarding her money and budget and this morning she woke up SO excited to GIVE!  She took her giving portion ($1)  with her today just in case she had a chance to give it to someone haha.  We discussed giving more in the car on the way to school.  She is already willing and happy to give  to those in need from what she earns :O)  (2 Corinthians 9:7 New Living Translation (NLT) 7  You must each decide in your heart how much to give. And don’t give reluctantly or in response to pressure. “For God loves a person who gives cheerfully.”)   


Okay, now for the fun part: making your little one some money management jars!  


Here is what you need:

3 Mason Jars
Ribbon
Small Tags
Twine
Burlap Cloth
Flowers
Scrapbook Paper


First, get your scrapbook paper out.  Remove the metal lid from your mason jar and place the outer rim (top-side-down) on the scrapbook paper to trace the inside circle (the part of the lid that screws onto the jar, not the flat center piece that covers the opening).  Trace 3 circles and cut them out.  Hot glue them to the flat part of the lid (the part that covers the opening).  


Next, size and cut your burlap fabric to fit around the body of the mason jar.  Then hot glue it onto the jar.


Before you move onto the next step, let's create the tags.  The tags I found at Michael's craft store were already painted with black chalk paint for $.59 each.  I used chalk paint pens to write the title for each jar onto them.  


After you create your jar tags, then take your choice of ribbon to size and cut it to fit around the neck of the bottle.   Hot glue the ribbon around the neck.  Tie the tag to hang from the ribbon.


Lastly, take your choice of flower and glue that onto the burlap fabric.


Complete all of the above on the other two jars and you will have yourself a wonderful, handmade system to introduce your little one to managing their earnings!  


I hope this is not only a fun project to complete, but also a project that helps you and your little one to explore how to work together on this learning journey!  :O)


Sending you uber loads of Love, Laughter and Light!


~Cassie


Monday, February 23, 2015

{MIY} MAKE-IT-YOURSELF MONDAY! Daily Chore Chart for Little One(s)

For those of you that have little ones that are of age to begin having daily chores, here is a great chore chart you can create that will help your little one to remember what their daily responsibilities are.


Here's what you need:

Cork Board
Fabric
Thumb Tacks
Twine
Scrapbook Paper
Mini Clothes Pins
Acrylic Paint
Marker


First cut the fabric a little bigger than our cork board.


Get your thumb tacks out.  Wrap the fabric around the the cork board and tack the fabric to the back.  I reinforced the fabric with hot glue because my tacks weren't staying very well because the back of my cork bard has a layer of cardboard backing.


Next punch out one tag so you can use it to help space out your twine.


Once you have your example tag then wrap, measure off and cut 6 strands of twine.  One for the heading and 5 for each weekday, Monday through Friday.  Tie the twine around the board.  I reinforced mine with hot glue so they would't slide down.


Once you have your six twine rows secure then you can finish punching out the rest of your tags.  Punch out as many as you need for each day.  


Then get your marker and write out 5 tags with a day on each one (Monday through Friday).  Then on the other tags write down the chores you want your little one to do each day on one side.  On the other side draw a smiley face  :O)


Get your mini clothes pins out and, starting on the second row of twine for Monday, hang each chore you would like your little one(s) to complete for that day.  Then go on to the next row for Tuesday and do the same.  Keep moving on to the next row for the next day until you complete Friday on the 6th row of twine.  


You're almost done with your little ones chore chart!


Last you'll get your acrylic paint out and paint a title on a rectangular strip of scrapbook paper.  I chose a simple title, "daily chores".  Then hang it on the top row of twine.


Tah-dah!  Your little one has a wonderful chore chart to refer to each day to complete their daily chores.  It's great fun for them to complete a task for the day and then flip the task around to reveal a wonderful smile :O)  This will help your little one to gain self-respect knowing that they are helping contribute to their personal up-keep and will be able to grow confidence as they help contribute to maintaining the family household.  


I hope you enjoy creating this fun chore chart for your little one! 


Sending you lots of Light and Laughter!

~Cassie


Monday, February 9, 2015

{MIY} MAKE-IT-YOURSELF MONDAY! Valentine Goody Bags!

 MIY Cassie Librizzi Valentine Bag

Valentine's Day is around the corner and every little one is looking forward to spreading their love of candy.  Here's a wonderful, inexpensive way to create a cute Valentine goody bag with your little one at home! 


What you'll need:

Yarn
ModPodge
Wax Paper
Small Paper Bags
Scrapbook Paper
Pipe Cleaners
Googly Eyes


MIY Cassie Librizzi Valentine Bag
First, cut the yarn one yard long for each heart you're going to make.


MIY Cassie Librizzi Valentine Bag
Get your wax paper out and draw hearts about 3 inches big.


MIY Cassie Librizzi Valentine Bag
Then mix 1 part water with 3 parts ModPodge in a bowl to create your glue.


MIY Cassie Librizzi Valentine Bag
(I love her little feet!)
MIY Cassie Librizzi Valentine Bag
(I love the cute faces she makes!)
Take a strand of yarn and soak it in the glue mixture.  Squeeze some of the excess glue from the yarn.


MIY Cassie Librizzi Valentine Bag
Put the yarn together squiggly like on the hearts you drew.  I outlined each heart with the yarn first then squiggle the yarn back and forth.  Then press the yarn down with your fingers to flatten the strands so they dry together better.  Let them dry overnight.


MIY Cassie Librizzi Valentine Bag
Once they're dry, peel them off of the wax paper.  Now you have the "body" of your goody bag!


MIY Cassie Librizzi Valentine Bag
Next get your scrap paper and cut small hearts.  You're going to use these to create wings.


MIY Cassie Librizzi Valentine Bag
Glue the hearts to the sides of the bags for the wings.


MIY Cassie Librizzi Valentine Bag
Then glue on the yarn hearts you made the night before.


MIY Cassie Librizzi Valentine Bag
Next get your pipe cleaners and clip them small enough to create antenna's and a smile :O)


MIY Cassie Librizzi Valentine Bag
Next glue on some googly eyes and see your little goody bag come to life!


MIY Cassie Librizzi Valentine Bag
Now for the fun  part, fill you bag with some sweet treats!  :O)


Nickelbug and I had so much fun making these together!!  :O)  I hope  you do too!


Sending you lots of Light and Laghter!

~Cassie

Monday, February 2, 2015

{MIY} MAKE-IT-YOURSELF MONDAY! Hand Painted Phrase on Handmade Pillow

In my quest to slowly brighten my little haven, I decided to add to my pillow collection in our family room.  Adding a little positivity and a refreshing floral print makes me smile uber big!  :O)  

Here's what you need:

Fabric
Thread
Fabric Paint
Pillow Stuffing
Word(s) of your choice
Cardboard


First, cut two squares of fabric the same size.  Iron them out if they have wrinkles on them.  You can have two types of fabric, like I did, or you can have both sides be the same pattern.  


Choose which one you want to paint your word(s) on then uber lightly sketch your word(s) onto the fabric.  


Get set up with your fabric and paint to begin painting the word(s) you sketched out.  Place the cardboard under the fabric to avoid getting paint on your work surface (sometimes the paint can bleed through the fabric).  Then paint your  word(s) on over your sketch.  Nicely, the fabric paint dries uber fast so you won't have to wait long to move to the next step.


Once the paint is dry, put the two RIGHT SIDES TOGETHER.  Snip each corner at an angle.  


Sew a zig-zag seam along the outter edges around the two pieces of fabric.  Make sure you leave a hole about a few inches long so that you can stuff your pillow later.


After you sew the zig-zag seam, then sew a straight stitch about 1/2 inch inside from the edge.  Again, leaving a few inches un-sewn to leave space for you to stuff your pillow.


Next, turn the pillow right-side-out.  Now you're ready to stuff your pillow!  I stuffed mine oodles lots which might seem a bit much, but over time it will soften and be perfect.


Stuff your pillow and then hand sew the closing seam to seal off your pillow.


You now have yourself a hand painted, homemade personalized pillow!!  It adds a little touch of fresh and it's doubly rewarding to know you made it all on your own  :O)


I hope you enjoyed this weeks Make-it-Yourself Monday! 


Sending you lots of Light and Laughter!!

~Cassie