Showing posts with label Easy Project. Show all posts

Monday, March 16, 2015

{MIY} MAKE-IT-YOURSELF MONDAY! For Adults Only!


This magical concoction is the perfect light, refreshing way to wind down from a hectic Monday, enjoy it as a pre-game drink before a date night, OR it can serve as a great Sunday-Funday beverage to sip on while lounging at home on a rainy day!  My boyfriend and I tested this personally last Sunday on our lounge day and it won an A+  :O)

Here's what you need:

LaCroix Sparkling Water
White wine of your choice
Strawberries
Blueberries


First, pick out some delectable blueberries and strawberries.  


Wash them up and then dice them up really well.  Put them in a bowl and (here's the fun part) mush them up uber mushy.  (confession:  I actually needed my boyfriends aid on this part as I'm apparently not skilled at mushing fruit)


Put a couple spoonfuls of your fruit mix into the glass.


Next pour in equal parts of LaCroix and your white wine, garnish your glass and enjoy!  


I hope you are refreshed with this sparkling glass of joy, CHEERS!!  :O)


Sending you uber loads of Love, Light, and Laughter!

~Cassie


Monday, February 9, 2015

{MIY} MAKE-IT-YOURSELF MONDAY! Valentine Goody Bags!

 MIY Cassie Librizzi Valentine Bag

Valentine's Day is around the corner and every little one is looking forward to spreading their love of candy.  Here's a wonderful, inexpensive way to create a cute Valentine goody bag with your little one at home! 


What you'll need:

Yarn
ModPodge
Wax Paper
Small Paper Bags
Scrapbook Paper
Pipe Cleaners
Googly Eyes


MIY Cassie Librizzi Valentine Bag
First, cut the yarn one yard long for each heart you're going to make.


MIY Cassie Librizzi Valentine Bag
Get your wax paper out and draw hearts about 3 inches big.


MIY Cassie Librizzi Valentine Bag
Then mix 1 part water with 3 parts ModPodge in a bowl to create your glue.


MIY Cassie Librizzi Valentine Bag
(I love her little feet!)
MIY Cassie Librizzi Valentine Bag
(I love the cute faces she makes!)
Take a strand of yarn and soak it in the glue mixture.  Squeeze some of the excess glue from the yarn.


MIY Cassie Librizzi Valentine Bag
Put the yarn together squiggly like on the hearts you drew.  I outlined each heart with the yarn first then squiggle the yarn back and forth.  Then press the yarn down with your fingers to flatten the strands so they dry together better.  Let them dry overnight.


MIY Cassie Librizzi Valentine Bag
Once they're dry, peel them off of the wax paper.  Now you have the "body" of your goody bag!


MIY Cassie Librizzi Valentine Bag
Next get your scrap paper and cut small hearts.  You're going to use these to create wings.


MIY Cassie Librizzi Valentine Bag
Glue the hearts to the sides of the bags for the wings.


MIY Cassie Librizzi Valentine Bag
Then glue on the yarn hearts you made the night before.


MIY Cassie Librizzi Valentine Bag
Next get your pipe cleaners and clip them small enough to create antenna's and a smile :O)


MIY Cassie Librizzi Valentine Bag
Next glue on some googly eyes and see your little goody bag come to life!


MIY Cassie Librizzi Valentine Bag
Now for the fun  part, fill you bag with some sweet treats!  :O)


Nickelbug and I had so much fun making these together!!  :O)  I hope  you do too!


Sending you lots of Light and Laghter!

~Cassie

Monday, February 2, 2015

{MIY} MAKE-IT-YOURSELF MONDAY! Hand Painted Phrase on Handmade Pillow

In my quest to slowly brighten my little haven, I decided to add to my pillow collection in our family room.  Adding a little positivity and a refreshing floral print makes me smile uber big!  :O)  

Here's what you need:

Fabric
Thread
Fabric Paint
Pillow Stuffing
Word(s) of your choice
Cardboard


First, cut two squares of fabric the same size.  Iron them out if they have wrinkles on them.  You can have two types of fabric, like I did, or you can have both sides be the same pattern.  


Choose which one you want to paint your word(s) on then uber lightly sketch your word(s) onto the fabric.  


Get set up with your fabric and paint to begin painting the word(s) you sketched out.  Place the cardboard under the fabric to avoid getting paint on your work surface (sometimes the paint can bleed through the fabric).  Then paint your  word(s) on over your sketch.  Nicely, the fabric paint dries uber fast so you won't have to wait long to move to the next step.


Once the paint is dry, put the two RIGHT SIDES TOGETHER.  Snip each corner at an angle.  


Sew a zig-zag seam along the outter edges around the two pieces of fabric.  Make sure you leave a hole about a few inches long so that you can stuff your pillow later.


After you sew the zig-zag seam, then sew a straight stitch about 1/2 inch inside from the edge.  Again, leaving a few inches un-sewn to leave space for you to stuff your pillow.


Next, turn the pillow right-side-out.  Now you're ready to stuff your pillow!  I stuffed mine oodles lots which might seem a bit much, but over time it will soften and be perfect.


Stuff your pillow and then hand sew the closing seam to seal off your pillow.


You now have yourself a hand painted, homemade personalized pillow!!  It adds a little touch of fresh and it's doubly rewarding to know you made it all on your own  :O)


I hope you enjoyed this weeks Make-it-Yourself Monday! 


Sending you lots of Light and Laughter!!

~Cassie


Monday, January 26, 2015

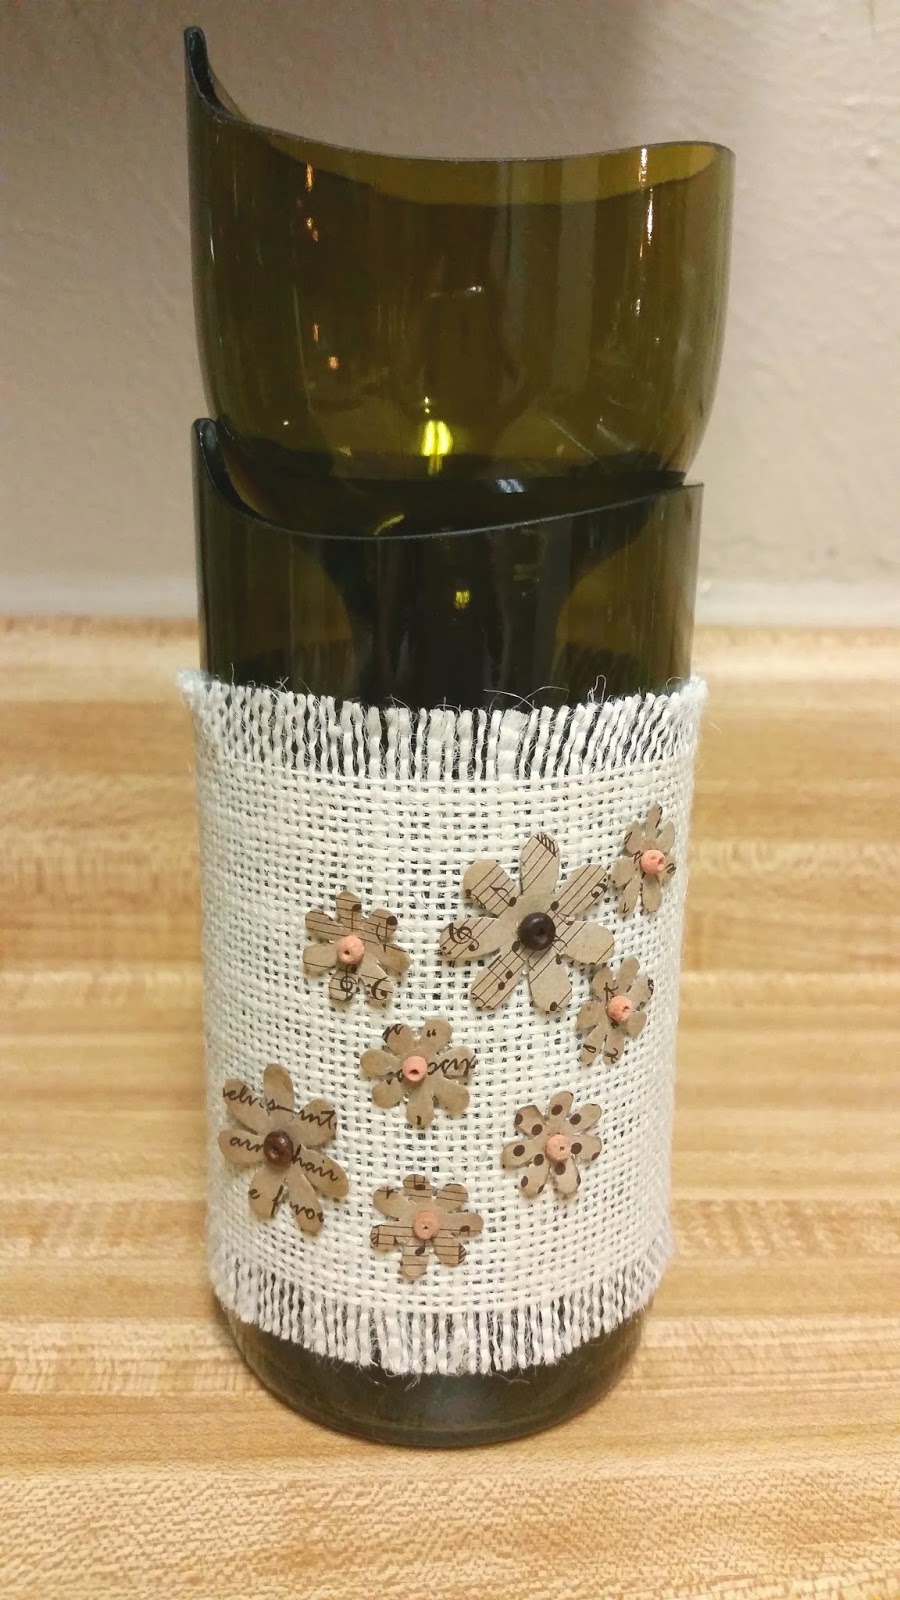
{MIY} MAKE-IT-YOURSELF MONDAY! Glass Planter Made with Recycled Wine Bottle


Have you ever enjoyed a good bottle of wine and sat there with the thought passing through your mind, "I wonder what I could make with this empty wine bottle?"  If so, then this is the "how-to" for you!  :O)  


Here's what you need:

Wine bottle (empty)  
Glass bottle cutter
Tongs 
Big cup
Emory sheets 
Cloth strip (pattern/color of your choice)


First get two BIG pots of water.  Put one on the stove, set it on high to get it to a continuous rolling boil.  Fill the other one with ice water and set it close to the boiling pot.  


While the one pot is coming to a boil and the other is icing, you need to score the glass bottle.  Get your glass bottle cutter and measure out where you want to create the score.  Secure the cutter and then score it.  Be uber gentle in scoring.  If you put too much pressure on the score line then it will cause the glass to separate at wonky angles.  You want to aim for a straight cut.  (side note:  I don't mind curved cuts, it gives it a different aesthetic look, but that's just personal preference) 

After your bottle is scored and your water is at a rolling boil, dip the bottle into the ice water to submerge the score line under the cold water.  Quickly remove it and place it into the boiling hot water to submerge the score line into the high heat.  Keep going back and forth, slowly and carefully, between the cold and hot water.  


Soon the bottle will separate along the score line and the top half will drop into the water.  Use the tongs to remove it so you don't burn or cut yourself along the sharp edges of the cut portions.  


(This one turned out a little straighter)


Once you have your two halves dry them off well and get your emory paper out to sand down the sharp edges.  

Next cut a strip of fabric about 18 - 24 inches long and double tie it about 6 inches down from the top.  Make note to do a loose double tie so that the knot is thick enough to not fall through the neck of the wine bottle.  Turn the top half of the wine bottle upside down and place the neck, head down, into the body of the bottle with the bottom end of the cloth strip through it so the knot stays on the top with the bottom half hanging through to the bottom of the bottle.  Then fill it with dirt and seeds, or plant, of your choice and water it.  

The water will drip to the bottom of the planter and the cloth strip will retain the water to keep the soil moist on top.  Brilliant, right?!  This is a fantastic planter for those that tend to forget to water their beloved plants.


You have yourself a handmade glass planter!
 
:O)  Decorate it and enjoy it!


I hope you enjoyed this "how-to" for a wonderful Make-it-Yourself Monday!  


Sending you lots of Light and Laughter!

~Cassie

Monday, January 19, 2015

{MIY} MAKE-IT-YOURSELF MONDAY! White-on-White Curtain with Tree Limb Curtain Rod


It's a new year and you're turning a new leaf.  Wanting to be more organized, be more put together and on top of upcoming tasks, all the while also purging the old and making way for the new!  Along with the New Year we are skirting up to Spring time!  I've already seen Easter decor and goodies out on store isles so I know it's on everyone's mind too.  I have already had a jump start on "spring cleaning" and now I'm moving on to revamping my indoor decor in an effort to get ready for warm, sunny days!  YAY for the fun stuff!!!

I'm starting with my living room.  Here is a simple curtain that you can make yourself and give your room some added character without draining the bank!  #winning  :O)


What you need: 

A white top bed sheet
Tree limb
Coat hooks
Thin cut fabric strips (or curtain hooks)
Fabric paint (color of your preference)
Cardboard or other board used for crafty stuff


I chose to do white on white to brighten up the living room a tad in contrast to my darker furniture and walls.


First, find a great spot that works for you to spread out and work.  I spread out on my living room floor, however, after about 10 minutes of leaning over my back started to hurt so I moved it to my kitchen table in order to stand and work.  


Make sure you set it up for you to be painting on the wrong side of the sheet.  When you go to hang it, the painted side will be facing toward the window. 


Place the cardboard (or other board of your choice) under the place you will paint on.  This protects the surface you’re working on from any paint that bleeds through the fabric. 


Place the stencil on top of the fabric, above the cardboard, where you want to paint, and then apply the paint.  Make sure to use a soft bristled brush and apply the paint lightly so as not to push too much paint through the fabric. 

This is a phenomenal project to get your little ones hands involved too!

Nickelbugs thumbs-up for her job well done :O)


Continue to move the cardboard around under the fabric as you move to the next spot to paint.  You can create a pattern, use the same stencil all over, or do like I did and paint random stencils randomly throughout.  Fabric paint dries fast, which is wonderful so you don’t have to wait for very long before moving on to the next stage.


Moving on, next you’ll fold the sheet in half along the length of it and cut it in half to create two panels.  (If you prefer to keep it as one large panel and tie it at the center, that works great too!  Just skip to the step of sewing on the tie straps)  Sew up the edges of the cut sides to create a clean edge and prevent the fabric from fraying.    


Next, get out your thin cut fabric strips and sew those onto the top edge of each curtain panel.  Now you have two beautifully painted curtain panels that are ready to hang!


Get out your coat hooks and your wood tree limb to measure and mark where the coat hooks need to be hung.  (I found a tree limb trekking around outside one day that has been sitting in my garage for a while)  After you have the coat hooks hung, lay your tree limb on the floor in order to tie on your curtain panels. 


Once your curtain panels are tied on then you are ready to hang your new curtains!  You can let them hang as is or you can tie them to the sides.  If you chose not to create two panels then you can tie it at the center or off to one side.  Either way you win! 


Pat yourself on the back for the amazing job you have done creating your own custom curtains!  I squealed a bit out of excitement at how awesome they turned out!  I am so fulfilled and I get so much enjoyment when a project turns out better than I thought it would :O)

I hope you enjoyed walking through the making of a light touch to my cozy corner :O) 


Sending you lots of Light and Laughter!

~Cassie


P.S. ~ Please share with me any thoughts or added ideas that you would like to see created on here!